Learn AutoCAD with our Free Tutorials
Welcome to CADTutor
CADTutor provides the best free tutorials and articles for AutoCAD, 3ds Max and associated applications along with a friendly community forum. If you need to learn AutoCAD, or you want to be more productive, you're in the right place. See our tip of the day to start learning right now!
Free Tutorials and More…
The Tutorials section provides over 100 original tutorials for AutoCAD, 3ds Max and other design applications. Michael’s Corner is an archive of productivity articles that brings you the best AutoCAD tips and tricks. Our Forum is a lively community where AutoCAD users can ask questions and get answers. The Downloads area provides free AutoCAD blocks, free AutoLISP routines and free images.
Tutorials of the Moment
Recently viewed tutorials
-
AutoCAD to Bryce

This tutorial takes a step-by-step approach to moving your AutoCAD 3D models into Bryce, applying materials and creating a setting. Format: Text/Image
Last visited: less than one minute ago
-
User Co-ordinate Systems

This tutorial describes what UCSs are, why we need them and how to use them. The correct use of UCSs with AutoCAD is the key to producing good 3D models and they can also help with 2D work. Format: Text/Image
Last visited: 3 minutes ago
-
Object Selection

This tutorial shows you the many ways AutoCAD objects can be selected. Covers the building of selection sets with implied windowing, fences etc. Format: Text/Image
Last visited: 4 minutes ago
-
Basic 3D and Surface Modelling

Although AutoCAD has a number of commands for creating special 3D objects, a lot can be achieved by changing the properties of basic 2D objects like polylines. This tutorial provides a basic introduction to creating and viewing 3D objects. Format: Text/Image
Last visited: 6 minutes ago
-
Dimensioning

This tutorial describes the options and commands available for dimensioning drawings and how to use them. The correct use of AutoCADs dimension tools is the key to producing clear and concise measured drawings. Format: Text/Image
Last visited: 7 minutes ago
-
Multi/Sub-Object materials

A Multi/Sub-Object material is a container for a number of sub-materials. This type of material is used when you need to assign different materials to different parts of an object and is used in infrastructure and environment projects mainly for objects such as benches, tables, lamposts, buildings etc. This tutorial works through a number of examples. Format: Text/Image
Last visited: 9 minutes ago
CADTutor Tutorials
Our tutorials are comprehensive but straightforward introductions to AutoCAD and related software. They are designed to help beginners get to grips with design workflows as quickly as possible. There are over 100 to choose from, some text/image based and others in video format. Whatever stage you are at in your learning, you should find a tutorial to help.
Forum Latest
Currently Active Topics
Aluminum composite panels parametric templates
by emosms
3 replies
Last post: 14 hours ago
LISP FOR STEEL PLATE FABRICATION
by CamDuy
1 reply
Last post: 21 hours ago
MESHSMOOTH: Controlling unwanted distortion when refining a 3D mesh
by indiancad
0 replies
Last post: 30 hours ago
INTERFERE: Telling overlaps apart from real assembly issues
by indiancad
0 replies
Last post: 30 hours ago
SOLIDEDIT: How do you handle a face that refuses to offset cleanly?
by indiancad
2 replies
Last post: 30 hours ago
Slide Library Select Slides to Extract
by Paul Li
0 replies
Last post: 32 hours ago
This Week's Hot Topics
Fillet Polylines Multiple
by SLW210
4 replies
Viewed: 279 times
Aluminum composite panels parametric templates
by emosms
3 replies
Viewed: 95 times
Generated ISO title block DXF: units, attributes and fonts when used in a template
by Margo App
2 replies
Viewed: 133 times
SOLIDEDIT: How do you handle a face that refuses to offset cleanly?
by indiancad
2 replies
Viewed: 103 times
LISP FOR STEEL PLATE FABRICATION
by CamDuy
1 reply
Viewed: 184 times
CAD Learning Game
by Luke P
1 reply
Viewed: 101 times
CADTutor Forums
Our forum is a vibrant community of experts and beginners. The main focus is helping beginners get to grips with AutoCAD and to help more advanced users become more productive. The AutoLISP forum is one of the busiest out there, providing expert advice for busy professionals.
AutoCAD Productivity
Rotate with the Copy Option
From: AutoCAD Productivity Articles #135
Originally published: August 2014
Grips don't get a lot of respect, but they are really quite powerful [See ‘The Lost Art of Grips’ in Michael's Corner March 2005], and the introduction of multifunction grips a few versions ago [Covered in Michael's Corner in July 2011 & April 2012], really kicked 'em up a notch.
However, what I want to mention here, is the Copy option of the Rotate command (…which is a similar feature when using grips, if you were wondering about the relevance).
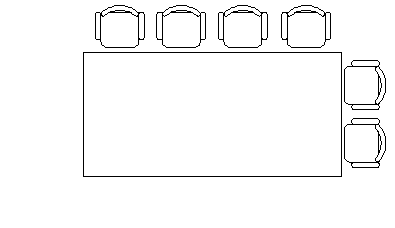
In the following exercise, the chair arrangement must be completed on all four sides.
How to Copy with Rotate
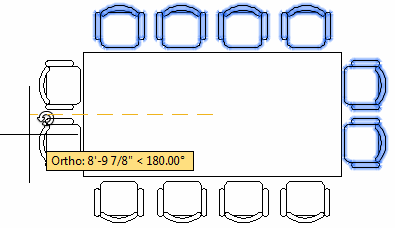
Launch the Rotate command, select the objects to rotate, then press [Enter].
To pick the middle of the conference table, Shift + Right-click and click Mid Between 2 Points, then click two diagonally opposed corners to specify the rotation basepoint between them.
Click the Copy option (or enter C if you have a version prior to AutoCAD 2013).
Turn on Ortho if necessary, then click to rotate—and copy—the selected objects!
See all the articles published in August 2014
Michael's Corner
Between 2003 and 2016, Michael Beall (and one or two guests) wrote almost 600 articles for CADTutor. The focus of these articles is AutoCAD productivity, and although some of them are now more than a few years old, most remain relevant to current versions of AutoCAD. The article above is just one example. Check out Michael's Corner for a full listing.
Image of the Week
-
19th – 25th October 2026
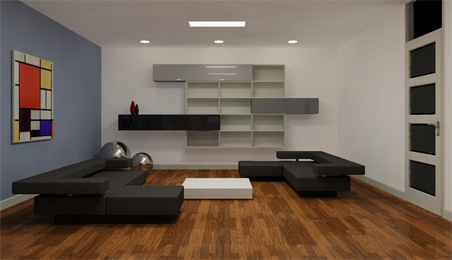
This week's image is by Oppie
Software used: AutoCAD 2011
-
Last Week's Image

Last week's image is by boofredlay
Software used: SketchUp and Twilight Render
-
Two Weeks Ago

This image is by mitchellrodhous
Software used: AutoCAD 2011
-
Three Weeks Ago
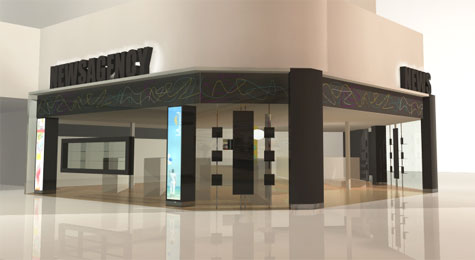
This image is by herdy1212
Software used: 3ds Max
Gallery of Work
Over the years, our forum members have contributed hundreds of images, showcasing their amazing work. The images above are just a small selection that demonstrate the wide range of project types our community is involved with. Take a look at our gallery to see all the images published in the last 12 months.
Tip of the Day
Do you want to turn it into one? <Y>
When using PEDIT and selecting an object which is not a polyline you will get a message asking if you want to turn it into a polyline. This can be quite annoying if you're having to create closed polylines from a bunch of lines. To stop getting this message, type PEDITACCEPT and press Enter. Then type 1 and press Enter. This will automatically answer "yes" to the question in future.
Missed a Tip?
Did you miss yesterday's tip? Maybe you forgot to drop by or maybe you don't visit over the weekend. If so, you can now see all the tips published during the past week. Also, if you have a tip you'd like to share with us, you can post it on our forum and if we like it, we'll publish it here.